

Let’s be honest, our beauty routines are evolving. We’re no longer chasing cluttered makeup bags or 10-step product layers. Instead, we’re leaning into intention. Into simplicity. And yes, into smarter formulations that do more with less.
As a formulator, I’ve seen firsthand how the demand for multi-use products has exploded, especially when it comes to cream color. Why carry three separate products when you can swirl your fingers into one creamy pot that effortlessly adds a flush to your cheeks and a glow to your eyelids?
But here’s the secret: creating a formula that works seamlessly across different areas of the face isn’t just about convenience, it’s about chemistry, skin compatibility, texture design, and above all, performance.
In this blog, I’ll walk you through exactly how to formulate a clean, nourishing, and truly multi-tasking cream tint, one that’s rooted in minimalism but delivers maximum impact. Ready to simplify beautifully? Let’s dive in.
Why Multi-Purpose Cream Tints Are Taking Over
We’re in a beauty moment where flexibility is everything. Consumers are no longer just looking for makeup, they’re looking for intention. They want fewer products, less waste, cleaner labels, and formulas that work without overcomplicating their routine. And that’s exactly where multi-purpose cream tints shine.
One swipe, one blend, and you’ve got color on your cheeks, eyes, and even lips. It’s effortless, natural-looking, and incredibly satisfying, especially for those who crave that dewy, skin-first kind of glow.
From a formulator’s lens, I find multi-use tints fascinating. You’re not just creating a pretty product, you’re solving a problem. You’re helping someone save time in the morning, pack lighter when they travel, or reduce their beauty footprint without sacrificing performance. And that’s powerful.
Plus, as indie and clean beauty brands grow, these types of hybrid formulas stand out on shelves. They invite creativity. They support minimalist branding. And they align beautifully with the slow beauty movement we’re all embracing.
In short: they’re not just trending, they’re redefining what modern beauty looks and feels like.
Key Benefits of Cream-Based Multi-Use Formulas
If there’s one thing I love about cream-based tints, it’s their versatility. These little pots of color are more than just makeup, they’re thoughtful, skin-loving formulations that meet the modern consumer where they are: craving simplicity without compromising results.
So let’s talk about the benefits, because trust me, there are plenty.
1. Blendability at Its Best:
Creams have that buttery softness that melts right into the skin. Whether you’re patting it onto your eyelids or dabbing it across your cheeks, the texture is forgiving, smooth, and easy to build, even with just your fingers.
2. Skin-Loving Ingredients:
Unlike powders that can sometimes feel dry or chalky, cream formulas allow you to load up on nourishing actives, think jojoba oil, mango butter, vitamin E. You’re not just adding color; you’re adding care.
3. Perfect for On-the-Go Beauty:
No brushes? No problem. These formulas are ideal for travel, quick touch-ups, and anyone who lives out of a tote bag (don’t we all?). One pot. Many uses. Zero fuss.
4. Sustainable and Minimalist:
Multi-use means fewer products, and that’s a win for your skin, your shelf, and the planet. Less packaging, less waste, and a more streamlined beauty ritual that still delivers that radiant payoff.
5. Universally Flattering Possibilities:
The right formulation can work across a wide range of skin tones and textures. From warm peachy tones to berry hues, cream tints can be designed to complement and enhance real skin, not mask it.
As a formulator, it’s a joy to create products that don’t just perform well, but also align with what people truly want today: mindful beauty that feels like self-care, not just self-decoration.
Choosing the Right Base Ingredients
Here’s where the real magic begins, the base. Think of it as the foundation that holds your creamy tint together. It’s not just about creating a beautiful texture (although that’s important), it’s also about how your formula feels on the skin, how long it lasts, and how it plays on different areas of the face.
So, what exactly goes into a well-balanced multi-use cream tint? Let’s break it down:
Emollients:
You want something that gives slip without feeling greasy. My go-tos? Caprylic/Capric Triglyceride (hello, featherlight feel!) and Jojoba Oil, because it mimics our skin’s natural sebum. These oils make your cream melt effortlessly into the skin.
Butters:
To give your formula that luxurious, cushiony feel, Shea, Mango, or Cupuacu Butter are brilliant choices. Mango butter especially works wonders here, light, non-comedogenic, and stable across a range of climates.
Waxes:
Waxes provide structure, especially if you’re going for a pot or stick format. Carnauba and Candelilla (for vegan options) are great at firming up the formula while still allowing for smooth application. Just don’t go overboard, too much wax can feel draggy on the skin.
Natural Thickeners & Stabilizers
If your formula has active botanicals or you’re working with natural pigments, you’ll want something like silica, rice bran wax, or ozokerite for that semi-solid, balm-meets-mousse consistency. These help suspend pigments evenly too!
Optional Add-ons:
Want a satin finish? A dash of mica can do the trick. Want to increase spreadability and reduce greasiness? Try a pinch of silicone alternatives like Meadowfoam Estolide or Neossance Hemisqualane, both skin-friendly and naturally derived.
The key is balance. You want a base that’s firm enough to hold its shape, soft enough to apply with fingers, and compatible with both eyes and cheeks. It’s like formulating a skincare-meets-makeup hybrid, one that feels as good as it looks.

Pigments That Play Well on Both Eyes & Cheeks
Alright, let’s talk about the soul of your cream tint, the pigment. This is where your formula comes to life with color, emotion, and personality. But choosing pigments for a multi-use product isn’t just about picking a pretty shade, it’s about choosing safe, skin-compatible, and versatile colorants that work equally well on delicate eyelids and the soft curves of the cheeks.
So how do we strike that perfect pigment balance?
1. Stick to Eye-Safe Options
First rule? Not all pigments are safe for the eye area. Some red iron oxides or certain lakes may work beautifully on cheeks but can irritate the eyes. Always double-check the safety approvals, especially if you’re selling or teaching others to formulate. I personally love using cosmetic-grade micas, iron oxides, and ultramarines that are clearly labeled “eye-safe.” No compromises here.
2. Universal Shades That Flatter All Tones
Look for shades that offer a natural flush across skin tones. Think peachy corals, rosy nudes, muted terracottas, or warm plums. These tones transition beautifully between cheeks and eyes, making them the ultimate multi-use heroes.
3. Matte vs. Shimmer – Know the Vibe
Want a natural day look? Stick to matte iron oxides. Going for something a bit more dewy or luminous? A touch of satin mica adds glow without chunky sparkle. Just remember: a little shimmer on cheeks looks fresh, but too much near the eyes can be tricky for mature or textured skin.
4. Disperse Properly
Pigments need a good carrier to blend evenly. If you’re using powdered pigments, pre-mix them in your oil phase or use dispersions in castor oil or jojoba esters. This avoids streaks and ensures a smooth, uniform tint.
5. Botanical Colorants (Optional, But Fun!)
If you’re formulating for the ultra-natural niche, you might play with ingredients like beetroot extract, hibiscus powder, or annatto, just know their stability and longevity may vary. They’re great for artisan batches or beginner-friendly explorations.
Ultimately, the best pigments are the ones that are safe, stable, and sensorially pleasing. You want your color to blend like a dream, stay put, and feel like second skin, whether it’s making your cheeks glow or your eyelids pop.
Texture Matters
Let’s be real, you can have the most beautiful pigment and the cleanest ingredients, but if the texture is off? Game over.
The magic of a multi-use cream tint lies in how it feels, that buttery-soft, non-greasy, finger-friendly texture that glides on like silk and blends without tugging. And crafting that dreamy consistency? That’s where your skills as a formulator really shine.
Here’s what I keep in mind when I’m working on that “just-right” feel:
Start With the End Use in Mind
Is it going into a pot? A stick? Do you want it to feel dewy or demi-matte? Is it for layering or for that quick single-swipe glow? The texture should serve the function. Pot formulas can be a bit richer, while sticks may need more wax to hold shape.
Get the Butter-to-Wax Ratio Right
Too much butter and your tint might feel too soft or melt in warmer weather. Too much wax, and it might feel draggy or stiff. I like starting with something like 20–25% butters and 5–10% waxes, then adjusting based on the climate and packaging. Tropical weather? Go a tad firmer.
Add Slip Without the Shine
This is where lightweight esters or oils like caprylic/capric triglyceride, Meadowfoam oil, or Neossance Hemisqualane come in, they give you that silky slip without making the formula overly glossy or greasy.
Avoid Greasy or Tacky After-Feel
This one’s a biggie. A multi-use cream should feel balanced, not sticky, not too oily. Add natural texturizers like silica, rice starch, or magnesium stearate to give that soft-focus finish and help reduce tackiness.
Stability Check
If your formula starts sweating, separating, or feeling grainy (especially with shea or cocoa butter), it’s often a sign of poor emulsification or cooling too slowly. Always pour at the right temperature, cool gradually, and test in different climates if you’re making this for a wider audience.
Because here’s the thing, the consumer doesn’t just swipe the product and say “wow, great INCI list.” They swipe it and say “ooooh, that feels good.”
So let’s give them that ooh. That buttery glide. That creamy blend. That texture that makes them fall in love before the pigment even shows up.

Packaging Ideas for a Multi-Use Look
Let’s talk about packaging, because your cream tint might be multitasking, but the way you present it should feel intentional. Packaging isn’t just about housing your formula. It tells a story. It signals the user experience. It sets the tone for your brand. And when done right? It makes a simple multi-use product feel like a must-have.
Here are a few of my go-to packaging ideas for cream blush-eyeshadow hybrids that don’t just work, they wow:
Small Glass or PET Jars (Pot Style)
Classic, eco-conscious, and perfect for finger application. Choose amber or frosted glass for a luxe, apothecary feel. Bonus points for wide mouths, they make it easier for users to dip, dab, and go.
Best for: Soft, buttery textures
Brand feel: Clean, artisanal, sustainable
Twist-Up Sticks or Tubes
Convenient, mess-free, and travel-friendly. These work best if your formula has a slightly firmer consistency (a little more wax helps here!). Push-up paper tubes are also a great low-waste option for earthy brands.
Best for: On-the-go users, cream-to-powder textures
Brand feel: Minimalist, eco-trendy, modern
Magnetic Tins & Palette Inserts
If you’re going pro or offering customizable kits, magnetic pans in palettes are fantastic. You can launch a collection of shades and let your customers mix and match. Talk about interactive and chic!
Best for: Buildable collections, makeup artists, gifting
Brand feel: Creative, modular, refillable
Airless Jars or Tubs
For a more high-end, skincare-inspired look, consider airless containers. They’re hygienic, prevent product drying, and feel super premium. Not always necessary for waterless balms, but if you’re adding active botanicals or infusions, they’re worth exploring.
Best for: Luxe branding, infused multi-use creams
Brand feel: Polished, high-performance, modern apothecary
Don’t Forget Labeling!
Your label is your first handshake. Clearly communicate the multi-use aspect:
“Tint for Cheeks + Eyes” or “All-in-One Cream Color” makes it easy for customers to understand the versatility at a glance. Use icons, instructions, or shade names that evoke emotion, like “Glowberry” or “Sunset Pop.”
At the end of the day, your packaging should feel as flexible and thoughtful as the product inside. Whether it’s a chic tin for makeup artists or a cute stick your customer keeps in her handbag, make it memorable.
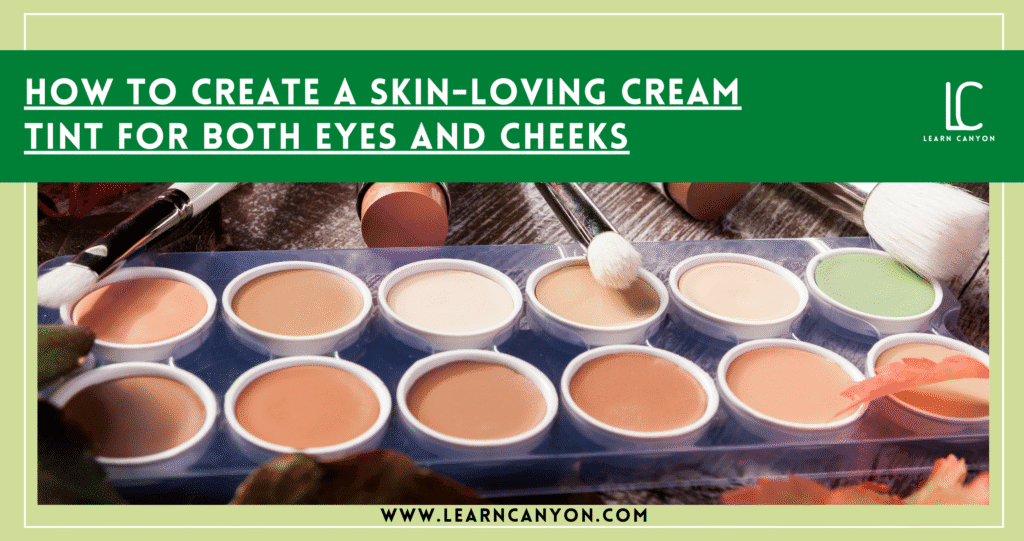
Formula: Priya’s Signature Creamy Tint (Eyes + Cheeks)
Alright, time for the fun part, the formula! Here’s one of my go-to base blends for a creamy, smooth, skin-loving tint that works beautifully on both eyes and cheeks. It gives a natural flush with buildable coverage, and the texture melts like a dream onto the skin.
This version is pot-friendly, finger-applicable, and made for that effortless “tint-and-go” look we all love.
Multi-Use Creamy Tint Formula (15g Batch)
Oil Phase (Melt Phase)
- Caprylic/Capric Triglyceride – 23.0% (Lightweight emollient with excellent slip)
- Jojoba Oil (Golden) – 10.0% (Balancing and non-comedogenic)
- Mango Butter – 12.0% (Soft, creamy body without being greasy)
- Candelilla Wax – 5.5% (Plant-based structure and shine control)
- Carnauba Wax – 3.0% (Adds hardness and heat resistance)
- Vitamin E (Tocopherol) – 0.5% (Antioxidant and skin conditioning)
Color Phase (Premix Separately)
- Red Iron Oxide – 2.0%
- Yellow Iron Oxide – 0.3%
- Brown Iron Oxide – 0.2%
- Mica (Optional – Soft shimmer) – 1.0%
(Pre-disperse these in 5% castor oil for smooth blending and even pigment distribution.)
Adjust Phase
- Silica Microspheres – 2.5% (For a soft-focus, non-greasy finish)
- Neossance Hemisqualane – 5.0% (Optional – adds a silky, non-oily finish)
- Natural Fragrance (IFRA Compliant) – 0.2% (Optional – think warm rose or soft vanilla)
Method:
- Melt Phase A in a beaker over a double boiler (~70–75°C) until completely liquefied.
- Premix your pigment blend in castor oil (or part of your oil phase) and stir until uniform.
- Add pigments to the melted oils and blend thoroughly using a mini mixer or glass rod.
- Cool slightly to around 50°C, then stir in silica, Hemisqualane, and fragrance (if using).
- Pour into clean jars or push-up sticks while still pourable. Allow to set at room temperature.
Customisation Tips:
- For drier skin: Add 2–3% Shea Butter for deeper nourishment.
- For a matte finish: Increase silica microspheres to 3.5–4%.
- To make a deeper shade: Bump up red and brown iron oxides slightly.
- To make it vegan: Keep using Candelilla and Carnauba, skip beeswax entirely.
This formula is such a flexible little gem, it works beautifully as a daily blush, a natural eyeshadow, and even as a soft lip tint (if your colorants are lip-safe!). It glides on smooth, builds softly, and gives that “woke up glowing” vibe without shouting.

Pro Tips: Testing, Safety & Performance
Now that you’ve got a beautiful formula, let’s talk about what separates a “fun DIY” from a truly professional, ready-for-the-world product, and that’s testing, safety, and performance.
Even though we’re working with natural and minimal ingredients, safety is never something we skip. Especially when your formula is designed to be used on delicate areas like the eyes and lips.
Here are some of my go-to pro tips to make sure your multi-use cream tint not only looks gorgeous, but performs like a star, and stays safe from pot to pout:
1. Patch Test Every Pigment Blend
Even if you’re using cosmetic-grade iron oxides or micas, always do a patch test on sensitive skin (inner elbow or behind the ear works well). Everyone’s skin is different, and this step helps rule out irritation, especially around the eye area.
2. Confirm Eye-Safe Colorants
Yes, this one’s worth repeating. Not all pigments are approved for use near the eyes. Double-check with your supplier that the colorants you’re using are “eye-safe” and, if you’re making a lip-friendly version too, lip-safe as well.
3. Stability = Happy Customers
Even in anhydrous (water-free) formulas, separation, sweating, or graininess can creep in if things aren’t well-balanced.
Test your formula:
- In warm temperatures (35–40°C)
- In cold storage (fridge test)
- Under sunlight (UV exposure check)
Look for changes in texture, scent, or consistency over 4–6 weeks. It’s worth the time.
4. Packaging Compatibility
You’ve made the perfect creamy tint, but does it play well with your chosen jar, tin, or stick? Some oils and butters can degrade plastic over time or leach into cardboard tubes. Always do a container compatibility test (especially with push-up sticks or paper packaging).
5. Wear Tests = Real Results
Apply your tint and observe:
- Does it crease on the eyelids after a few hours?
- Does it stay put or slide around?
- Does it fade beautifully or patch?
Ask testers with different skin types to try it out. The real world is the best lab sometimes!
6. Keep It Clean (But Preserved If Needed)
Even though you’re working with a water-free base, keep your tools, containers, and workspace sanitised like a pro lab. And if you’re planning to add infused oils, botanical extracts, or anything with even trace moisture, consider adding an antioxidant or broad-spectrum preservative. Better safe than sorry.
At the end of the day, our goal isn’t just to make pretty products, it’s to make safe, stable, and joyfully effective ones. The kind that your customers (or students) fall in love with at first swipe, and keep reaching for again and again.
Conclusion
In a world that often tells us “more is better,” choosing to formulate something simple, clean, and multi-functional is a powerful act. You’re not just creating a product, you’re creating an experience. One that honors time, skin, and sustainability.
Multi-use cream tints are more than just a trend. They’re a reflection of how beauty is evolving, toward intentional choices, skin-loving formulas, and effortless rituals. And as a formulator, you get to shape that movement with every batch you make.
Whether your creamy tint ends up in a tiny glass jar on someone’s vanity or becomes part of your indie brand’s hero line, remember this: simplicity done right is anything but basic. It’s elegant. It’s efficient. It’s empowering.
So go ahead, experiment, refine, and make something beautiful that does more with less. Because minimalist beauty isn’t about cutting corners. It’s about formulating with heart, precision, and purpose.
Now it’s your turn, get those pigments swirling, pour your intention into your beaker, and let your creamy creations shine.